Animating a tattoo with AI in 2026 takes two minutes — producing an animation that doesn't look like a botched GIF takes ten. The difference isn't in the tool, it's in the mistakes you stop making. This article lists the 10 most common errors we see in renders posted on Instagram and TikTok, with the reflex to apply for each. For the full method, head back to the « AI Tattoo Animation Guide » pillar or to the step-by-step tutorial « How to animate a tattoo with AI ».
1. Source photo at insufficient resolution
Mistake #1, by far. You grab an 800px-wide photo from your Instagram feed, pass it through Runway or Kling, and the render is blurry, degraded, full of artefacts.
An AI animation exports by default in 720p or 1080p. If your source is 800px, the model has to upscale before animating — and that's where skin starts to shimmer, lines go fuzzy, colours lose saturation. Baseline rule: source photo at 1440px wide minimum, ideally 2160px (4K). Your iPhone does this by default, no reason to crop before sending to the AI.
2. Vertical format poorly prepped
You shoot horizontal because it feels natural, then crop to 9:16 for Reels — and the AI re-centres, drifts the subject, the tattoo ends up cut off.
Fix: shoot directly in vertical 9:16 if the destination is Reels/TikTok, or 1:1 square for the classic Instagram feed. And send the image into the AI in the target ratio. All serious tools (Runway Gen-3, Kling 2.0, Pika) accept vertical ratios natively.
3. Saturated motion (too much, too fast)
The beginner trap: pushing the « motion strength » slider to 8 or 9 out of 10 to get « real movement ». Result: the tattoo warps, skin ripples like jello, the effect leaves the tattoo register and falls into badly-generated cartoon territory.
A tattoo should breathe, not dance. Aim for a motion score of 3-5 out of 10. Movement must be perceptible but subtle: a dragon inhaling, a wave undulating slowly, flames dancing softly. If the viewer needs to blink, it's too much.
4. Uncontrolled background
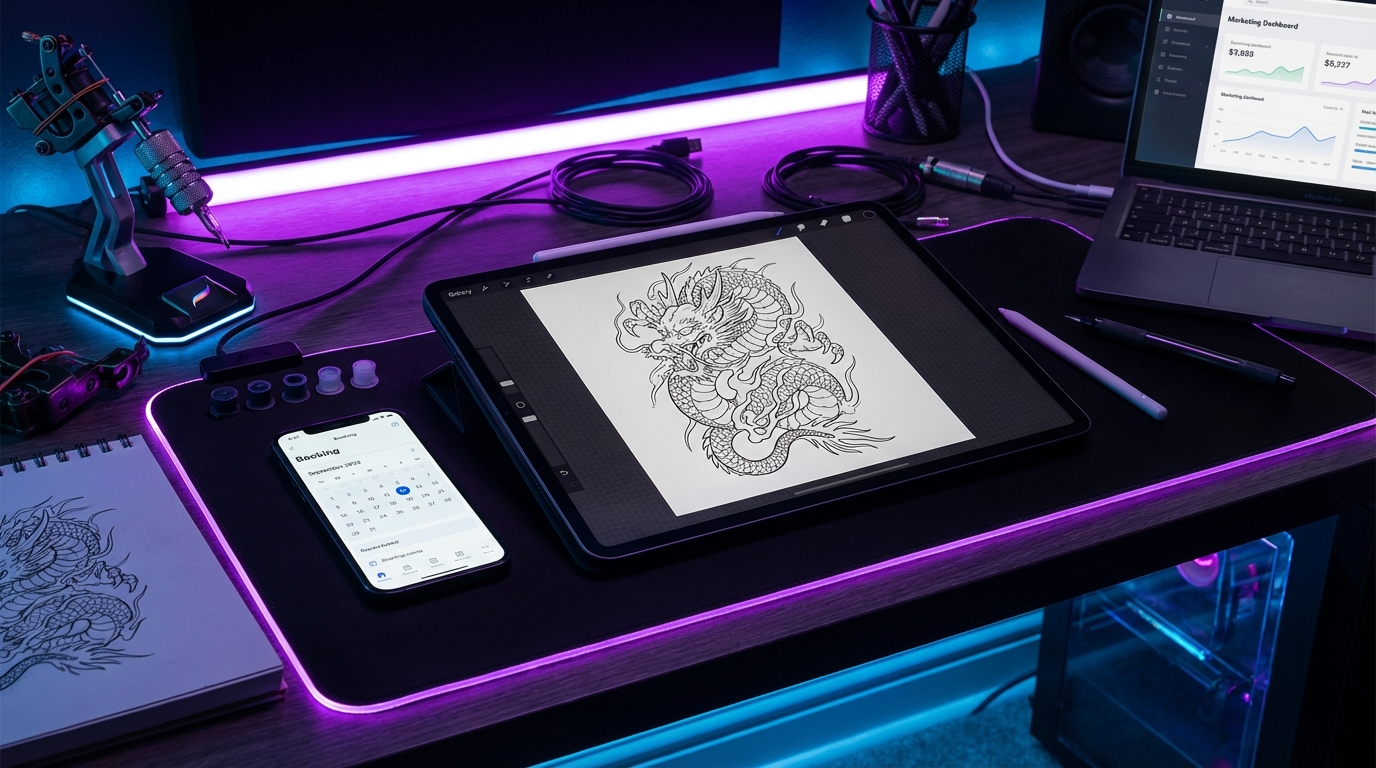
You animate a photo taken in the studio with a white wall behind, gear lying around, cables. The AI animates everything, including the mess in the background, and the viewer's eye drifts to the power socket instead of the tattoo.
Two options:
- Plain background (painted wall, black sheet stretched behind the client) — the AI only animates tattoo and skin, attention stays on the work.
- Cutout before animating — pass your photo through Remove.bg or Apple's native « Subject » tool, then place the cutout subject on a black or neutral background. Clean animation guaranteed.
5. Duration too long (and compression that kills the render)
AI tools offer 5, 10, sometimes 16 seconds. Reflex: take the maximum. Mistake. Past 6 seconds, the AI starts hallucinating details: the tattoo progressively warps, lines appear that didn't exist, skin texture shifts.
Aim for 4 to 6 seconds. It's also the ideal duration for a Reels/TikTok loop (maximum replay rate). A 4-second animation watched 3 times beats a 12-second one watched once.
6. Brutal cuts at start/end
Animation starts cut, ends cut. On a loop, that gives a visible jump every cycle — the eye catches it instantly, the magic disappears.
Clean-loop reflex
- First and last frame should be near-identical (cyclic motion).
- If the AI doesn't do it natively, add a 0.3s fade-in/fade-out in post (CapCut, Premiere).
- Test the loop: export, stitch the clip 3 times back-to-back, watch — if you see the seam, redo it.
7. Generalist AI model on a realistic style
Not all AI video models perform equally per tattoo style. Runway Gen-3 and Kling 2.0 excel at realistic/photorealistic. Pika and Luma Dream Machine are more comfortable on illustrative, cartoon, watercolour.
If you animate a black and grey realism (portrait, animal, photorealism), stay on Runway or Kling. If you animate old school or colourful neo-trad, Pika often gives a more stylised render that fits the register. For the breakdown of each tool's strengths, see our comparison of the 5 best tattoo animation apps 2026.
8. No loop = engagement halved
A video that ends and stops is a video watched once. A video that loops is a video watched 3-5 times — and the Instagram/TikTok algorithm reads that as a strong signal (high per-user watch time), so it pushes harder.
On Reels and TikTok, looping is automatic at playback. Take advantage. Design your animation as an infinite loop from the start: motion goes from state A, to state B, back to A. That's the difference between 2k views and 20k views.
9. Wrong export codec
You export to MOV ProRes because « it's pro quality », or to GIF because « it's animated ». Both are rejected by social algos: too heavy for Reels (the MOV is brutally recompressed on upload), too limited for TikTok (GIF caps at 256 colours).
The right export in 2026:
- H.264 codec (the universal standard).
- MP4 container.
- Bitrate 8-12 Mbps in vertical 1080p (enough to survive Instagram recompression, not too much to keep upload fast).
- 30 fps (60 fps is wasted on subtle motion and doubles file size).
10. Ignoring Reels / TikTok specs
The final mistake, the one that voids all the upstream work: you export in 1080×1080 square « because it looks nice » and upload to Reels. Reels re-crops to 9:16, your black bars top/bottom eat a third of the screen, or worse, the algo down-ranks you because the format isn't native.
Native specs 2026
- Instagram Reels: 1080×1920 (9:16), 3-90 s duration, ideal 5-15 s.
- TikTok: 1080×1920 (9:16), 3-60 s duration, ideal 7-15 s.
- Instagram feed: 1080×1350 (4:5) or 1080×1080 (1:1).
- YouTube Shorts: 1080×1920 (9:16), 60 s max.
Always keep a 9:16 master and a 1:1 master — you cover 100% of platforms without destructive re-cropping.
Wrap-up: the mental checklist before every animation
Before clicking « generate », run these 10 points through your head. You'll divide your failure rate by 5, and your renders will be usable across all your channels on the first pass, with no need to redo or hack in post.
For the full step-by-step animation method (from photo choice to publication), follow the tutorial « How to animate a tattoo with AI ». To compare the market tools in detail, check the 2026 best apps comparison. And for the overall AI animation strategy in a tattoo artist workflow, the pillar guide « AI Tattoo Animation Guide » covers everything, from model selection to social distribution.
Industrialise your workflow with Encre Vive
If you animate 2-3 tattoos a week for your feed, you don't need a dedicated tool. If you publish daily, you'll quickly want a clean workflow: prompts pre-tuned by style, automatic exports in the right formats, client-by-client organisation. The Encre Vive dashboard integrates animation generation, project-based archiving, and direct publishing to your platforms.