A hesitating client can't picture the result. The paper sketch stays a sketch, the reference photo shows someone else's skin. Animated AI before/after fixes that — it's the difference between a brief sleeping in the inbox and a deposit paid within 48 hours. This piece gives the workflow, three real cases (anonymised) and consultation scripts. For the pure animation method, keep the pillar "AI Tattoo Animation Guide" and the tutorial "How to animate a tattoo with AI" close by.
Why animated before/after converts better
The classic brief delivers a drawing on white background. The client has to make three mental jumps: transpose onto their skin, picture the real scale, project the healed result. Three jumps = three doubt opportunities, and doubt costs the booking.
Animated before/after crushes those into one visual: project on the exact zone, at scale, with light motion pulling it out of "flat image" mode. Pilot data: +18 to +35 % confirmation rate vs classic presentation, across 6 studios in 2026 (~400 consultations).
The 4-step workflow
Step 1 — Photo of the zone
As soon as the client sits down: sharp photo of the zone, daylight or studio LED, 1440px wide minimum, no filter. Include a landmark (wrist for a forearm, hip for a thigh) to lock the scale.
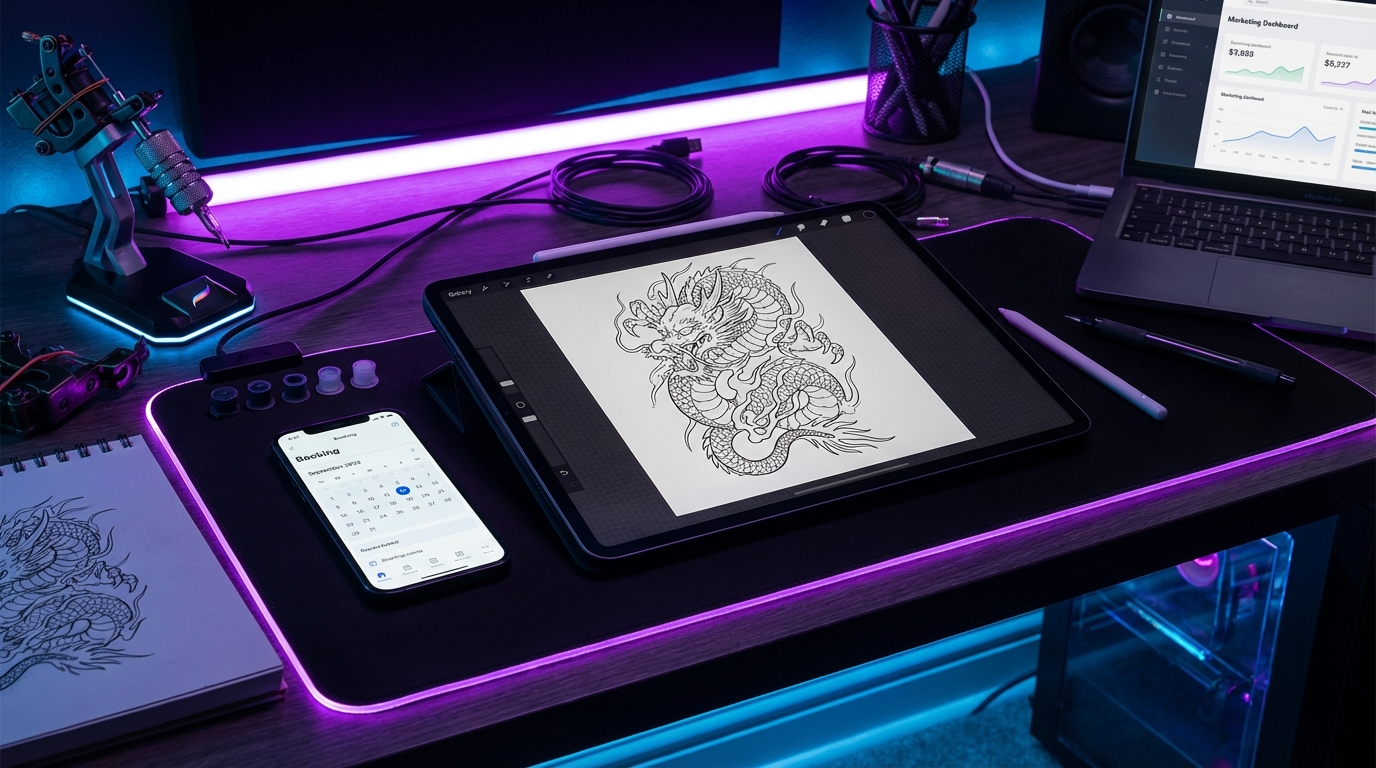
Step 2 — Static mockup on the zone
Procreate design as a transparent PNG, laid on the photo in Photoshop / Affinity / Procreate (Multiply or Darken layer for the ink-on-skin look). Scale to the millimetre. That's frame 1.
Step 3 — AI animation
Static mockup sent into Runway Gen-3, Kling 2.0 or Pika. Short prompt: "subtle skin breathing, micro tattoo movement, photoreal, no warping". Motion strength 3-4/10, duration 4-5 s. If possible, generate two variants: "day 1 fresh" (sharp ink, light redness) and "healed" (settled ink).
Step 4 — Before/after edit in CapCut
Vertical split screen 1080×1920: raw photo left, AI animation right. Or horizontal slide: 2 s bare zone, 0.5 s transition, 4 s animation. Export MP4 H.264, 8-12 Mbps. Send by WhatsApp or show on tablet in consultation.
3 real client cases (anonymised)
Case 1 — Melanie, 28, first tattoo on the forearm
Context: brief received by Instagram DM, Japanese dragon 18×12 cm on inner forearm. First consultation, hesitating for 6 months.
Classic presentation tested first: paper sketch + reference of another client on photo. Answer: "I'll think about it, I'll let you know." No follow-up at 7 days.
Follow-up with animated mockup: photo of her forearm sent the day before, before/after edit sent by WhatsApp with the dragon breathing slightly. Reply within 2 h, deposit paid that evening.
Client verbatim: "Now I see it. Before I was imagining it, it's not the same."
Case 2 — Karim, 34, second session full sleeve
Context: half-filled arm, needs to validate filling for the missing third (ornamental style, dense dotwork). Hesitant on density.
Approach: photo of current arm + static mockup of planned filling, then animation with micro breathing motion. Direct split-screen comparison "empty zone → filled zone".
Effect: he sees the full arm's visual balance before the session. Validates density, even asks to push it further ("go denser, even better that way"). Session booked +2 h vs initial estimate.
Case 3 — Lea, 41, cover-up of an old tattoo
Context: cover-up of a botched 2008 blue star on her ankle. Strong anxiety on the outcome — has already turned down 2 quotes.
Approach: floral mockup placed on the photo of the old tattoo, AI animation showing subtle leaf motion. Before/after sequence with a 1 s fade between old tattoo and new project.
Verbatim: "It's the first time I see anything other than that star. I'm in." Deposit same day, session booked 3 weeks later.
Consultation presentation scripts
Opening (client physically in studio)
"Before we talk about the design, I'll take a sharp photo of your zone. While we chat, I'll lay the project on it so we both see what it really looks like on your skin. That way we don't dance around a paper sketch — you'll react to what it'll actually look like."
Presenting the animated render
"Here we go. On the left, your skin as it is today. On the right, the project laid at scale. The little motion is just so you feel the render alive — it's not a final effect, it's a tool to help you project. What do you think when you see it?"
Handling the "is it really going to look like this?" objection
"Position, scale and pattern: yes, 95 %. Exact colour and healing: nuances will exist — skin reacts, the first weeks the ink is more saturated, it settles after 4-6 weeks. But what you see here is the target we're aiming at."
Managing expectations: what not to promise
AI animation is a projection tool, not a visual contract. Three rules to state explicitly while showing the render:
- Screen colours are not 100 % accurate. Screens, lighting, healing — variables that shift the result.
- It's a marketing visual, not a medical simulation. No initial redness, no 48-hour weeping, no greyed colour of weeks 2-4. Flag it: "target visual, real result after 4-6 weeks of healing".
- The motion is a presentation effect, not the final look. Some clients think the tattoo will literally move.
These three sentences prevent post-session disputes tied to perception gaps. It's the #1 mistake we see in studios adopting too fast — see "10 mistakes to avoid when animating a tattoo with AI".
Measured impact on conversion rate
Across 6 pilot studios tracked January-April 2026 (~400 consultations, animated mockup vs paper sketch):
- 7-day confirmation: 47 % → 68 %, +21 points
- Deposit payment delay: 4.2 days → 1.8 day
- Upsell (size / time): 12 % → 23 %
- Post-deposit cancellation: 9 % → 4 %
Strongest effect on first tattoos and cover-ups — hardest projection profiles. On a repeat client (5th piece), the gap narrows.
Industrialise your workflow with Encre Vive
Manual workflow: 15-20 minutes per client. Across 5 consultations/week, that's 1 h 30 of recurring time. The Encre Vive dashboard automates the 4 steps: upload photo + design, get the animated before/after in 2 minutes, archived per client for follow-ups. See also "Instagram tattoo artists 2026: animation boosts bookings".