Finger tattoo ideasLittle space, a clear silhouette.
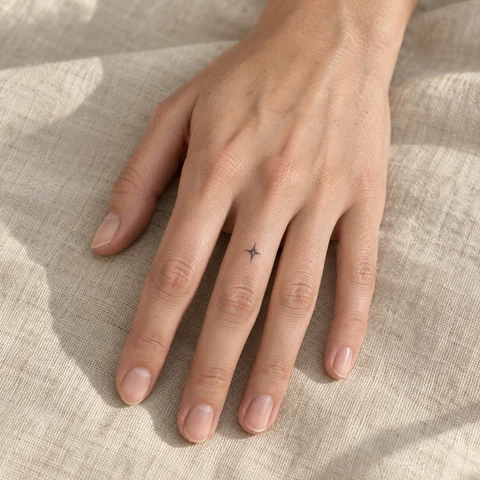
Compare finger tattoo ideas with a single star, a miniature sprig and an open band. Exact position, spacing and visibility matter as much as the symbol you choose.
More about this selection
The drawings are references for silhouettes, not designs that can all be reduced unchanged. A branch may need fewer leaves and a moon fewer stars. Ask an artist experienced with fingers to assess the project and show healed examples of their work.
Finger tattoo ideas on skin
Light, medium and dark skin tones, different proportions and placements: compare how each motif sits on the body. These images are simulations created with our AI.
A single star
One four-point star sits on a finger segment. A clear silhouette provides an alternative to many closely spaced symbols.
PersonaliseA miniature sprig
A few leaves sit along a short stem. Use the reference to discuss how many leaves remain readable at the intended size.
PersonaliseAn open band
Two separated ends suggest an open ring. Review every side of the finger when planning a band, even though the photograph shows only the top.
PersonaliseMore designs to explore
Try another direction: start with a line, a silhouette or a colour, then adapt the design in the studio.
One four-point north star
PersonaliseOne simple solid black lightning bolt
PersonaliseOne small ocean wave
PersonaliseOne short olive twig with six simple leaves
PersonaliseA crescent moon and three stars
PersonaliseOne very simple outline of two mountain peaks on short horizontal baseline
PersonaliseSimplify the motif while keeping its intention
A finger has little width and changes shape when the hand closes. A symbol on one segment, side lettering and a band are distinct projects. Start with one intention and check the placement with your hand open and relaxed.
The drawings are references for silhouettes, not designs that can all be reduced unchanged. A branch may need fewer leaves and a moon fewer stars. Ask an artist experienced with fingers to assess the project and show healed examples of their work.
Explore tattoo meanings →Three directions to compare
A simple silhouette
Keep a small number of shapes and assess their presence before adding details.
Explore this direction →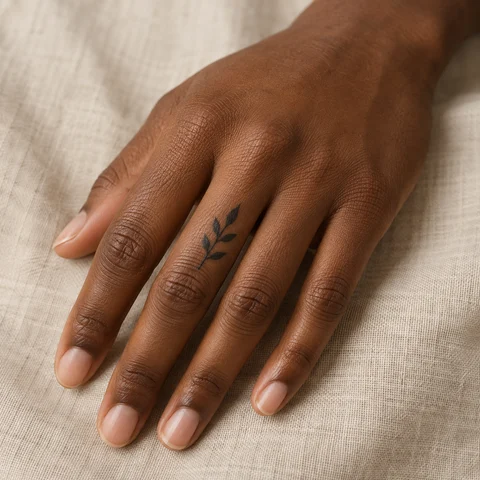
Fine lines and open space
Compare the main outline and the gaps between lines at the intended size.
Explore this direction →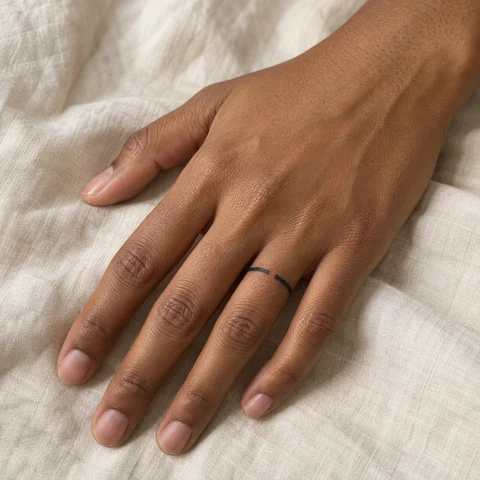
Geometry and rhythm
The centre, repeated shapes and spacing give the design structure. Review them on the body.
Explore this direction →Where should your tattoo go?
Top of a finger segment
A single symbol is easy to compare with the hand open. Check its position between the joints instead of centring it on a photograph alone.
Side of the finger
Visibility changes as the fingers come together. Long lettering and closely spaced details need a specific discussion about feasibility.
A band at the base
Plan a ring tattoo around the whole finger. Define any opening and joins, then compare the design with your jewellery.
From a reference drawing to a small format
For a star, start with its number of points and outline. For a sprig, decide which leaves are essential. For a band, compare a single line with an open shape. Removing a detail should clarify the subject rather than make room for another tiny element.
If you love a detailed motif, keep a hand or wrist option too. The same subject may need more space to remain legible. This gallery cannot prescribe one minimum size for every skin type and technique.
Questions to discuss with your artist
Healed examples
Ask to see work on the same side of the finger. A fresh photograph or simulation does not show how the actual result develops.
Follow-up
Discuss possible touch-ups, their conditions and the expected limitations. A photograph cannot guarantee how many touch-ups you may need.
Your daily routine
Describe your work, manual activities and jewellery. Your artist can explain preparation and aftercare for your situation.
More directions for your project
From the first design to your appointment
Clarify your reference
Keep a few images and explain what you like about each: the subject, linework, scale or placement. A reference starts a conversation; it is not a finished stencil.
Choose an artist for the style
Look at the artist’s own work, including healed examples where available. Discuss the intended dimensions, placement and any text before requesting a quote.
Check the final drawing
Review the stencil at its actual size and in several natural positions. Read names and dates character by character before approving them.
Prepare the appointment and aftercare
Ask your tattoo artist for preparation and aftercare instructions tailored to the session. The images here cannot determine what is suitable for your individual skin.
What if your next tattoo
started with your words?
Choose a direction, change a detail and create your own reference with Encre Vive.
Create my tattooView plans and creditsYour questions answered
01Which motif should I choose for a finger?
Start with a simple shape such as a star, simplified sprig or band. Agree on dimensions and feasibility with the artist on the exact surface of the finger.
02Will a finger tattoo stay sharp?
A simulation cannot predict that. Review the artist’s healed examples and discuss line spacing, exact placement and follow-up before deciding.
03Can I have a tattooed wedding band?
Discuss it with an artist who works on this area. Decide whether the band is complete or open and have the whole circumference assessed.
04How much should I budget?
The artist’s work, dimensions, detail and exact placement determine the quote. Bring your references and intended size, and ask what the proposal includes.
05How can I personalise a design?
Choose a reference to open the studio with its subject and style. Adapt the motif and ask your artist to prepare the final dimensions and placement.
06Are these real tattoo photographs?
These are original AI-generated simulations. They illustrate composition and placement; they do not predict the result on your skin.