Foot tattoo ideasA motif planned around movement.
Compare foot tattoo ideas with a botanical branch, side wave and geometric ornament. Consider the foot’s shape, your footwear and the amount of visibility you want.
More about this selection
These images show bare feet so placements are clear. In daily life, shoes and straps change the view. Compare the drawing with your usual footwear and discuss the project, appointment and aftercare with your artist.
Foot tattoo ideas on skin
Light, medium and dark skin tones, different proportions and placements: compare how each motif sits on the body. These images are simulations created with our AI.
Botanical foot branch
A diagonal branch follows the length of the foot, leaving space around the toes and the ankle.
PersonaliseA small wave
A simplified wave sits on the side of the foot. Discuss the exact position with your artist; this side view helps compare length and visibility.
PersonaliseFan-shaped ornament
Arcs and points open towards the toes. Space around the outline separates the ornament from the shape of the foot.
PersonaliseMore designs to explore
Try another direction: start with a line, a silhouette or a colour, then adapt the design in the studio.
One short olive twig with six simple leaves
PersonaliseOne small ocean wave
PersonaliseOne four-point north star
PersonaliseA sprig of lavender and a chamomile flower intertwined beneath a small crescent moon
PersonaliseOne compact rose bloom without stem
PersonaliseA butterfly with spread wings
PersonaliseChoose a direction on a moving surface
The top and outer edge of the foot offer different views. A diagonal branch follows its length, an ornament opens towards the toes and a small wave sits on the side. Define the area first, then the details that need to remain visible.
These images show bare feet so placements are clear. In daily life, shoes and straps change the view. Compare the drawing with your usual footwear and discuss the project, appointment and aftercare with your artist.
Explore tattoo meanings →Three directions to compare
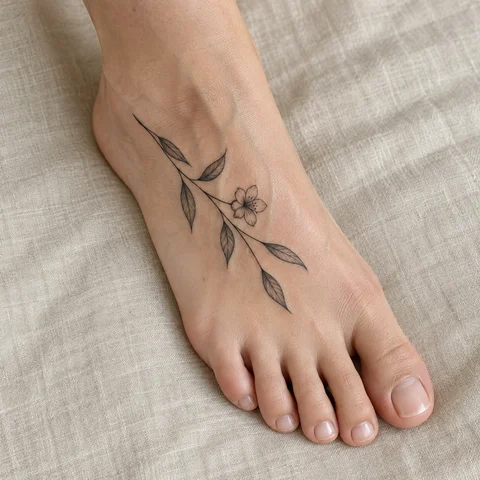
Fine lines and open space
Compare the main outline and the gaps between lines at the intended size.
Explore this direction →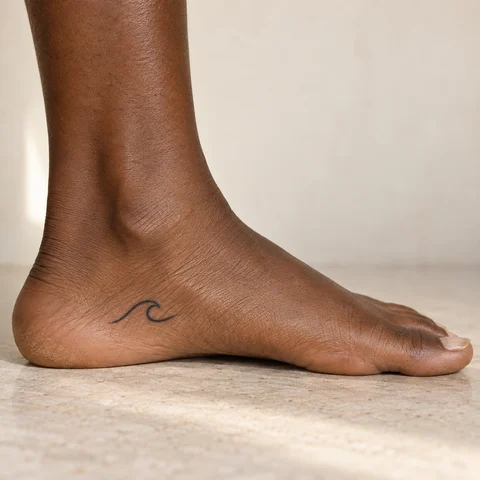
A simple silhouette
Keep a small number of shapes and assess their presence before adding details.
Explore this direction →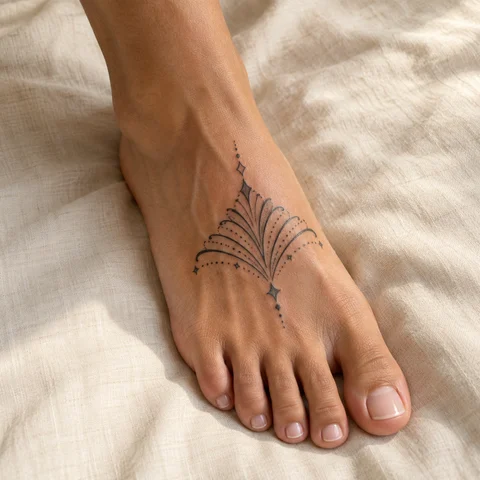
Geometry and rhythm
The centre, repeated shapes and spacing give the design structure. Review them on the body.
Explore this direction →Where should your tattoo go?
Top of the foot
A branch or ornament reads from above. Keep clear boundaries before the ankle and the base of the toes.
Outer edge
A short design appears in profile. Discuss its exact position and expected development with an artist experienced in this area.
Connecting to the ankle
One composition can link both surfaces. Plan the change of direction and check the positions of straps and shoe edges.
From a small symbol to an ornament
A branch
A diagonal stem follows the foot without tracing its exact outline. Separate the leaves and consider their orientation from your viewpoint.
A side wave
A simple silhouette makes the design’s presence easy to judge. Avoid shrinking an entire detailed seascape into an unreadable miniature.
A fan-shaped ornament
Arcs and points can open across the top. Adapt the centre, margins and number of elements to the actual surface.
Plan around your footwear requirements
Tell the artist which shoes you need for work and activities. Identify contact areas on the proposed design and ask how to arrange the appointment and follow aftercare instructions. Do not set your schedule from a healing promise beneath a photograph.
Review the placement with your foot on the floor in a natural position. Ask for healed examples on the same surface and discuss follow-up. A simulation cannot predict how the lines will look on your individual skin.
More directions for your project
From the first design to your appointment
Clarify your reference
Keep a few images and explain what you like about each: the subject, linework, scale or placement. A reference starts a conversation; it is not a finished stencil.
Choose an artist for the style
Look at the artist’s own work, including healed examples where available. Discuss the intended dimensions, placement and any text before requesting a quote.
Check the final drawing
Review the stencil at its actual size and in several natural positions. Read names and dates character by character before approving them.
Prepare the appointment and aftercare
Ask your tattoo artist for preparation and aftercare instructions tailored to the session. The images here cannot determine what is suitable for your individual skin.
What if your next tattoo
started with your words?
Choose a direction, change a detail and create your own reference with Encre Vive.
Create my tattooView plans and creditsYour questions answered
01Top or side of the foot?
The top offers a broader composition; the side suits a short line seen in profile. Compare visibility with your shoes and have the exact placement assessed.
02Can I choose very fine detail on the foot?
Adapt the detail to the area and dimensions. Show your reference to an experienced artist and ask which lines need simplifying or more space.
03When should I book a foot tattoo?
Choose the date with your artist after discussing activities and footwear requirements. Their preparation and aftercare instructions should inform the appointment.
04How much should I budget?
The artist’s work, dimensions, detail and exact placement determine the quote. Bring your references and intended size, and ask what the proposal includes.
05How can I personalise a design?
Choose a reference to open the studio with its subject and style. Adapt the motif and ask your artist to prepare the final dimensions and placement.
06Are these real tattoo photographs?
These are original AI-generated simulations. They illustrate composition and placement; they do not predict the result on your skin.