Ankle tattoo ideasA quiet symbol or an open ornament.
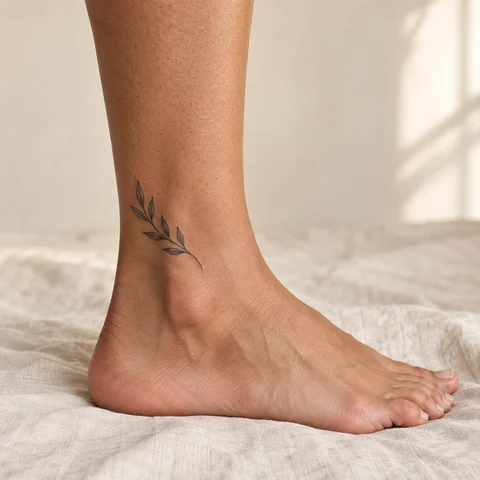
Explore ankle tattoos with an olive branch, small crescent and ornamental anklet. Compare the sides of the ankle, the shape of the design and the position of your usual shoes.
More about this selection
Look with your foot on the floor and as you move. Shoe edges and sock height may hide part of the design. If it may extend towards the calf or foot, establish its direction and boundaries with the artist.
Ankle tattoo ideas on skin
Light, medium and dark skin tones, different proportions and placements: compare how each motif sits on the body. These images are simulations created with our AI.
Curved olive sprig
A small branch curves above the ankle. Its open end keeps the motif separate from the outline of the foot.
PersonaliseOrnamental anklet
A line and spaced arcs suggest a chain around the ankle. Plan the joins by viewing the leg from several angles.
PersonaliseA small crescent moon
An isolated crescent at the ankle: a simple symbol whose placement is part of the project.
PersonaliseMore designs to explore
Try another direction: start with a line, a silhouette or a colour, then adapt the design in the studio.
A sitting cat seen in profile
PersonaliseOne short olive twig with six simple leaves
PersonaliseOne small ocean wave
PersonaliseA crescent moon and three stars
PersonaliseOne four-point north star
PersonaliseA sprig of lavender and a chamomile flower intertwined beneath a small crescent moon
PersonaliseCompose around the shape of the ankle
An ankle tattoo can sit above the ankle bone, occupy the side or form a band. Each option changes how the same drawing reads. A branch follows a curve, a moon creates an isolated point and a circular line needs a planned join.
Look with your foot on the floor and as you move. Shoe edges and sock height may hide part of the design. If it may extend towards the calf or foot, establish its direction and boundaries with the artist.
Explore tattoo meanings →Three directions to compare
Fine lines and open space
Compare the main outline and the gaps between lines at the intended size.
Explore this direction →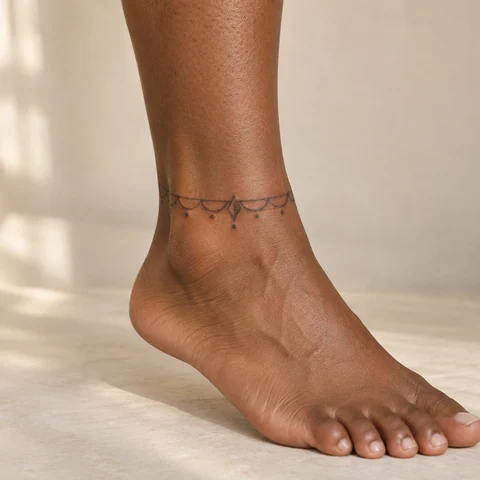
Geometry and rhythm
The centre, repeated shapes and spacing give the design structure. Review them on the body.
Explore this direction →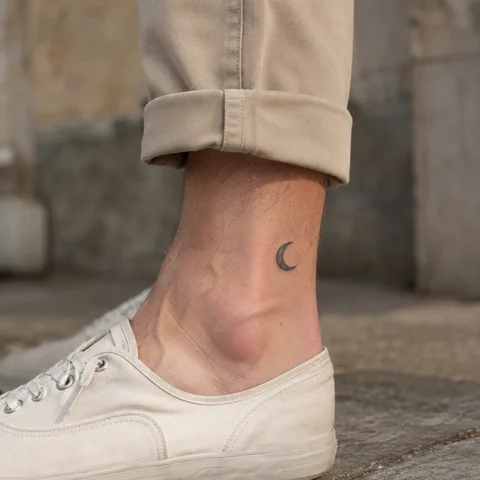
Fine lines and open space
Compare the main outline and the gaps between lines at the intended size.
Explore this direction →Where should your tattoo go?
Outer ankle
A short symbol or branch appears in profile. Compare positions above and beside the ankle bone using a full-size mock-up.
Inner ankle
The view changes with the position of your feet. Look standing with your feet together and apart to judge its presence.
Around the ankle
A complete band or open composition needs several viewpoints. Place the join and any central motif before adding details.
A moon, branch or ornamental band
An isolated crescent
The contrast and curve can carry the whole idea. Compare sizes without automatically adding stars to fill the space.
A light branch
The stem can follow the ankle and open towards the calf. Keep leaves distinct so the shape remains readable.
Drawn jewellery
Arcs, points and repeated details can suggest a chain. Check the pattern around the whole ankle instead of squeezing the final motifs to close a band.
Include footwear in your placement choice
Check the height of your trainers, boots and sandals. A strap may cross a central detail while a lower shoe reveals the full design. Compare these views before deciding the tattoo’s height.
Discuss activities, travel and footwear requirements when arranging the appointment. Follow your artist’s preparation and aftercare instructions; this gallery cannot set an individual healing schedule.
More directions for your project
From the first design to your appointment
Clarify your reference
Keep a few images and explain what you like about each: the subject, linework, scale or placement. A reference starts a conversation; it is not a finished stencil.
Choose an artist for the style
Look at the artist’s own work, including healed examples where available. Discuss the intended dimensions, placement and any text before requesting a quote.
Check the final drawing
Review the stencil at its actual size and in several natural positions. Read names and dates character by character before approving them.
Prepare the appointment and aftercare
Ask your tattoo artist for preparation and aftercare instructions tailored to the session. The images here cannot determine what is suitable for your individual skin.
What if your next tattoo
started with your words?
Choose a direction, change a detail and create your own reference with Encre Vive.
Create my tattooView plans and creditsYour questions answered
01Which small motif suits the ankle?
A moon, wave, simplified animal or branch are possibilities. Choose the silhouette you enjoy and check its legibility at the intended size.
02Can an anklet tattoo be open?
Yes. An opening can be part of the design. Discuss its position and the ends of the line with your artist.
03Can I connect ankle and foot tattoos?
That can be a composition goal. The changing surface and footwear position require an adapted drawing, rather than simply extending a flat image.
04How much should I budget?
The artist’s work, dimensions, detail and exact placement determine the quote. Bring your references and intended size, and ask what the proposal includes.
05How can I personalise a design?
Choose a reference to open the studio with its subject and style. Adapt the motif and ask your artist to prepare the final dimensions and placement.
06Are these real tattoo photographs?
These are original AI-generated simulations. They illustrate composition and placement; they do not predict the result on your skin.