Nape tattoo ideasBetween the hairline and the back.
Compare nape tattoos with a small sprig, rosette or butterfly. Explore height, width and the way your hairstyle or collar reveals the design at the back of the neck.
More about this selection
Hairstyle makes a substantial difference to visibility. Compare hair down and tied up, then try your usual collars. A discreet motif in one photograph may become obvious in another situation; include both views in your references.
Nape tattoo ideas on skin
Light, medium and dark skin tones, different proportions and placements: compare how each motif sits on the body. These images are simulations created with our AI.
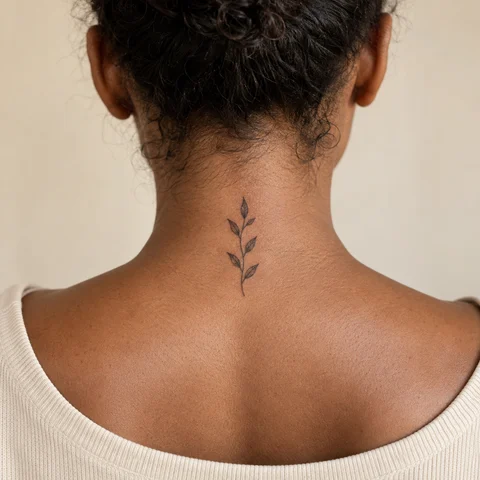
A sprig beneath the hairline
A small branch sits below the hairline. Its compact height provides a comparison with designs that extend onto the upper back.
PersonaliseAn open rosette
A black rosette creates a focal point at the base of the neck. Spaced petals define the shape without relying on tiny details.
PersonaliseButterfly at the nape
A butterfly centred at the nape, with space around the wings as important as the lines.
PersonaliseMore designs to explore
Try another direction: start with a line, a silhouette or a colour, then adapt the design in the studio.
One compact rose bloom without stem
PersonaliseA death's-head hawkmoth
PersonaliseOne short olive twig with six simple leaves
PersonaliseA symmetric mandala with a dotwork gradient
PersonaliseA crescent moon and three stars
PersonaliseA butterfly with spread wings
PersonaliseDefine a motif below the hairline
The nape is the back of the neck. A high sprig, horizontal butterfly and lower rosette occupy different spaces. Decide whether your drawing should remain localised or start a line towards the back.
Hairstyle makes a substantial difference to visibility. Compare hair down and tied up, then try your usual collars. A discreet motif in one photograph may become obvious in another situation; include both views in your references.
Explore tattoo meanings →Three directions to compare
Fine lines and open space
Compare the main outline and the gaps between lines at the intended size.
Explore this direction →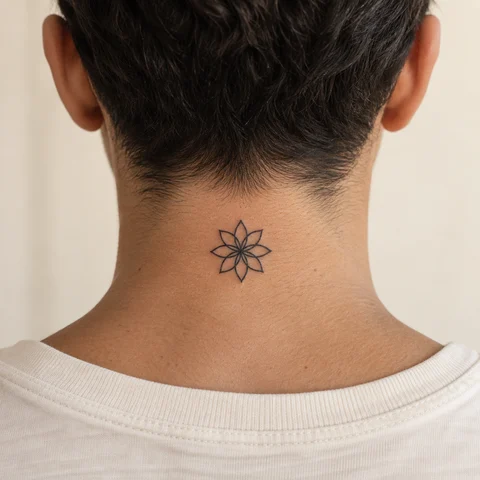
Geometry and rhythm
The centre, repeated shapes and spacing give the design structure. Review them on the body.
Explore this direction →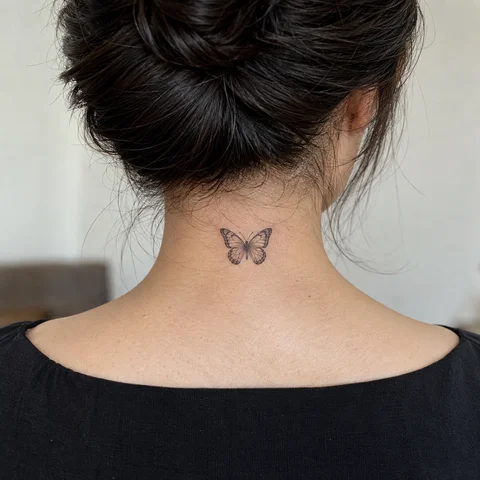
Fine lines and open space
Compare the main outline and the gaps between lines at the intended size.
Explore this direction →Where should your tattoo go?
Below the hairline
A compact motif can sit high. Let the artist determine its distance from the hair and compare visibility with your usual cut.
Centre of the nape
A butterfly or small rosette can create a central point. Check the width with your head in a natural position.
Towards the upper back
A branch or sequence can extend down the centre of the back. Decide whether that continuation belongs in the initial project.
Choose between width and height
An open butterfly
Wings create a horizontal presence. The body can establish the centre while the wings keep space around the contour of the neck.
A vertical sprig
A few leaves and a short stem follow the height. Plan any extension into the back instead of simply stretching the motif.
A rosette
A centre and separated petals create a compact silhouette. Adapt the design’s symmetry to the actual placement and neck movement.
Test the design with hairstyles and collars
Take a rear photograph with your hair up and another with your usual hairstyle. Repeat with a round collar and a more open neckline if you wear one. Check which part stays visible and where the clothing interrupts the shape.
The nape is hard to observe directly. A photograph taken from a distance can help compare height and width; then review the stencil with your artist. Avoid relying only on a close-up without a sense of scale.
More directions for your project
From the first design to your appointment
Clarify your reference
Keep a few images and explain what you like about each: the subject, linework, scale or placement. A reference starts a conversation; it is not a finished stencil.
Choose an artist for the style
Look at the artist’s own work, including healed examples where available. Discuss the intended dimensions, placement and any text before requesting a quote.
Check the final drawing
Review the stencil at its actual size and in several natural positions. Read names and dates character by character before approving them.
Prepare the appointment and aftercare
Ask your tattoo artist for preparation and aftercare instructions tailored to the session. The images here cannot determine what is suitable for your individual skin.
What if your next tattoo
started with your words?
Choose a direction, change a detail and create your own reference with Encre Vive.
Create my tattooView plans and creditsYour questions answered
01Is a nape tattoo always discreet?
No. Visibility depends on its position, size, your hair and clothes. Compare several everyday situations before deciding.
02Are nape and neck tattoos the same?
The nape is specifically the back of the neck. The neck collection also explores side placements and the area below the ear.
03Can a nape tattoo extend onto the back?
Yes. Plan a shared direction and spacing with the artist, including the edge of any existing piece.
04How much should I budget?
The artist’s work, dimensions, detail and exact placement determine the quote. Bring your references and intended size, and ask what the proposal includes.
05How can I personalise a design?
Choose a reference to open the studio with its subject and style. Adapt the motif and ask your artist to prepare the final dimensions and placement.
06Are these real tattoo photographs?
These are original AI-generated simulations. They illustrate composition and placement; they do not predict the result on your skin.